
Raise your hand if you’d rather watch a video to learn something new than read about it.
Go ahead — you’re not alone. 59% of executives say they’d rather watch a video than read text, too. And really, that number makes sense — we are a society of video streamers. (I mean, hello, Netflix.)
But if you’re not sure how to run a live stream event on social media, fear not. We’re here to make sure you don’t just hit the “Live” button on Facebook and stare at the camera like a deer in headlights. Instead, we’ve come up with a comprehensive checklist to help you plan your first — or next — live stream.
How Live Streaming Works
Live streaming is a way to broadcast your events to an online audience. It’s a digital alternative to something like selling tickets to an in-person event and allows you to reach people near and far with live video.
Brands use live streaming for a few different reasons, but according to a Brandlive survey, 74% of businesses used it to engage with their consumer base. So instead of being the proverbial “man behind the curtain,” you’re allowing viewers to put a face (or faces) to your organization’s name, all in real time.
Live streaming can be used for a number of different event types, as well. Everyone from the White House to fashion houses to chefs have live-streamed videos of economy briefings, runway shows, and cooking demos, respectively. Here at HubSpot, we’ve used it for things like interviews with thought leaders. So feel free to be creative — just make sure you’ve got your bases covered.
A Step-by-Step Guide to Live Streaming
When you’re ready to start learning how to live stream successfully, follow these steps:
1. Plan your live stream like you would any other event.
Think about some of the most popular talk shows. Can you imagine if the guests, sets, lighting, and schedules for something like “The Tonight Show” weren’t planned in advance? To say the least, it might be chaotic.
You’ll want to put the same thought and due diligence into your live stream that you’d put into an in-person event of its kind. And you’ll want to have your goals in mind as you begin to make those plans; those will dictate a lot of the logistics.
Who
Knowing your target audience will determine a few pieces of the planning process. If it includes an international population, that should factor into the date and time of your stream — be sure to think about time zones or holidays that might not be top-of-mind in your home country.
What
Then, think of what category your live stream falls into, and create a title for your event. In case you don’t find any of the above examples fitting to your business, we’ve got some ideas for ways businesses can use live videos.
HubSpot’s Social Media Marketing Manager, Chelsea Hunersen, stresses the importance of thoroughly researching the topic of your live stream in advance.
“Decide important points or stats to hit,” she says. And if you’re going to feature guests, “designate a moderator/host who can make sure these points are hit and can wrap up the conversation if necessary.”
Where
The platform you use (which we’ll get to in a bit) can also be dependent on who you want to view the stream. Different audiences use different channels, so you’ll want to pick the one that’s most likely to draw the crowd you want.
Finally, pick an optimal location from which you’ll broadcast your stream. Consumers have a low tolerance for a bad stream, watching for at most 90 seconds if the connection is spotty or poor-quality, so make sure your setting is conducive to a positive viewing experience. Does it have good lighting? Is it prone to a lot of noise? Is there a chance that your dog walker will barge in yelling, “Who’s a good boy?” loud enough for the entire audience to hear? (Not that that’s happened to me.)
Think of these contingencies, then pick a streaming venue that insulates you from them.
2. Choose your platform.
Here’s where you’ll really need to have your goals in mind since different platforms can achieve different things.
YouTube Live
YouTube Live Events tend to have “two goals,” says Megan Conley, HubSpot’s Content Marketing Strategist. “Registrants and attendees.”
So, if you’re looking to boost revenue — which 75% of marketing professionals are using video to do — YouTube Live is one of the best platforms to use.
Here’s how that works. First, if you don’t have one already, you’ll need to create an account on Google, which you’ll then use to create one on YouTube.

Once that’s done, you can use YouTube’s Live Streaming Events dashboard to schedule a future stream — just click on “Enable live streaming,” if you haven’t already set it up.
YouTube requires a 24-hour buffer between the time that you enable live streaming and your first live. Once that 24-hour period is up, all you have to do is log into your YouTube Studio.
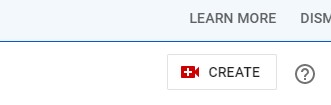
Then, click the “Create” button in the top right corner.
This will prompt a drop-down that asks you to choose between uploading a video or going live. Choose “Go live.”

YouTube will then prompt you to complete some basic info such as its title and what age group the video is made for. You’ll also need to decide if you’re going live right away or scheduling it for a certain time.
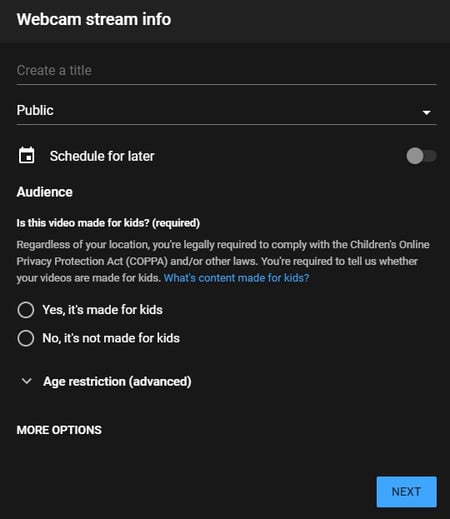
After that, you’ll need to indicate if you want your event to be public or private — here’s where you’ll decide how you want to use your live stream to generate leads.

The Unlisted option accomplishes two things:
I’ll be able to generate a link that attendees will get only after they fill out a registration form.
It won’t stream directly onto my YouTube page.
Once you’re done, click “Next” You will be asked to smile to take a thumbnail, so make sure you’re camera-ready. From there, you have the option to “Go Live” or “Share” your content.
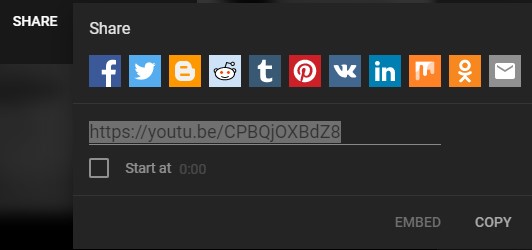
Click “Share,” and that will generate your event’s URL. As I mentioned above, you can keep that behind a landing page where attendees fill out a form to register.
Conley says that, generally, this type of live stream is embedded on a thank-you page behind a landing page form.
If you use the HubSpot COS, all you’ll need is the link, and the system will generate the embed code for you.


Just click “insert media,” paste the link you copied from YouTube, and you’re done.
If embedding isn’t an option, you can still just put a link there — the embed code just creates a seamless design that you can place right on your thank-you page. Either way, be sure to use the thank-you page as a place to remind your attendees of the date and time of the event.
There’s also the option to make your YouTube Live Event completely open to the public. That’s a good option, Conley says, for a major event that you “want anyone and everyone to be able to find.” But if you make your stream public, she points out, make sure you use the event to promote gated content you want your audience to download.
“An image CTA would do,” she notes, as would holding up clearly printed short links throughout the stream (Make sure you have those printed out in advance!). In the image above, you’ll also see that you can add a message to your video — you can mention your gated content there, too.
Facebook Live has been making quite a few headlines lately, and businesses stand to benefit from it — Facebook Live videos produce 6 times as many interactions as traditional videos.
Even without pre-registration, you can definitely promote streams on this platform in advance, which we’ll touch on later. In the meantime, if you haven’t used it before, check out my colleague Lindsay Kolowich’s overview of Facebook Live.
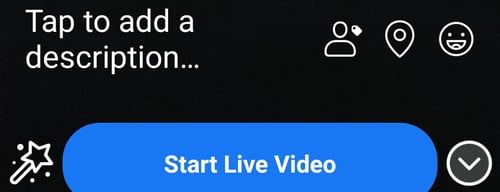
The interface for Facebook has recently changed, so you’ll have an easier time live streaming from your mobile Facebook app.
Depending on your device, you may see the “Live” option right under the Composer when you open the app. Alternatively, you may need to click “Create Post” at the top of your News Feed, then select the three horizontal dots in the Composer.
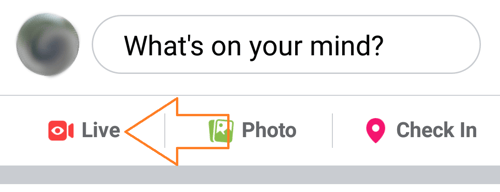
You’ll have a chance to write a comment about your video. Once you’ve done that, you can select “Go Live” in the bottom left corner.
Instagram Live
You can also live stream on Instagram. With Instagram Live, a functionality in the Instagram Stories feature, you’re able to broadcast video streams and save the replay to your Stories. Users are able to engage through likes and comments during the stream.
This is a great platform for live streaming since Instagram Stories are used by 500 million users per day, and one-third of most-viewed Stories are from businesses.
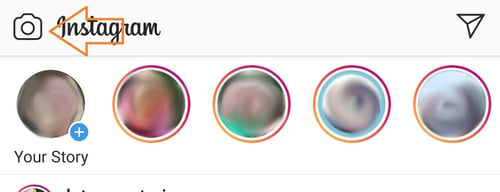
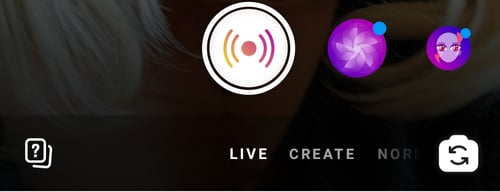
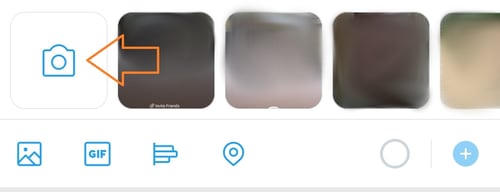
Keep in mind that you cannot post to Instagram from your browser, so open the mobile Instagram app to begin your live stream. Then, select the camera icon in the top left corner next to the Instagram logo.
At the bottom of the camera viewer is a menu that scrolls horizontally. Select “Live.”

The shutter button will change to a broadcast icon. This will immediately take you live if you tap it, so make sure you’re camera ready.
Twitter Live
Twitter’s advantage is that you can easily share and promote content to a large audience, even if you don’t have a large following. In addition, hot topics spread more quickly than other media outlets.
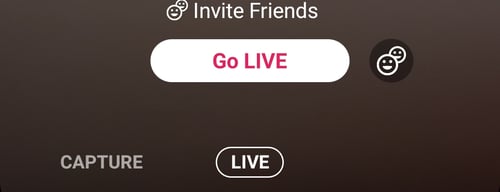
If you want to hit the ground running and generate buzz, Twitter is a great choice. However, you cannot go live on Twitter from your browser, so open the mobile Twitter app when you’re ready to start your broadcast.
Once there, open the Tweet composer by clicking the button with the feather and plus sign.
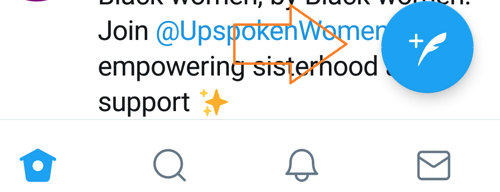
Select the camera icon.
At the bottom of the camera viewer is the choice between “Capture” and “Live.” Choose “Live.”

The shutter button will be replaced with a button that says “Go Live.” This will immediately take you live, so make sure that you have everything set up before pressing it.
TikTok
Since 2018, TikTok has had major buzz as the newest big player in the social media game as a platform for short-form videos. While TikTok’s audience trends younger with 41% of users between 16-24 years old, more people and brands are taking to the platform, as evidenced by its place as the fourth most downloaded app in 2018.
One big drawback is that you can only go live on TikTok if you have 1,000 followers. For accounts where this isn’t a problem, here’s how to broadcast live:
Open your TikTok mobile app and select the plus sign at the bottom of the screen.
Then, enter the title of your stream and select “start.”
It’s that easy!
The live streaming options certainly don’t end there. Major brands have also used platforms like Periscope, Livestream, and Twitch. They all have their own sets of features and advantages, so definitely take the time to look into which one best suits your needs.
3. Choose your equipment.
When it comes to the actual hardware required for your live stream, some of it is fairly intuitive: A camera is pretty standard, for example, or a device with one installed (like a laptop or phone).
But if you do use your phone, Conley says, be sure to use a tripod. “There’s nothing worse than recording a Facebook Live and having your arm start to fall asleep five minutes into the recording,” she advises. “Use a phone tripod to give your live streaming a professional look.”
Consider how professional you want your sound quality to be, too. Your camera might have its own microphone, but if your setting is more prone to noise, body mics might not be a bad idea, either.
And when you’re using an external camera, says Hunersen, you’ll also need some sort of encoding software (Facebook has a great step-by-step guide to that). That’s what converts the camera footage into a format that your streaming platform understands and can broadcast to viewers. The software you use might depend on your budget, but to get started, check out this one from Adobe.
Also, think about setting up a professional backdrop, like one with your logo. That can help to brand your videos and give them some visual consistency, which is a particularly good practice if you plan to do a lot of live streaming in the future.
Want to take that a step further? “Set up a makeshift studio in your office to speed up the prep time for all of your future recordings,” Conley says. “A beautiful, branded backdrop could be just what your Facebook Live needs to help grab the attention of someone quickly scrolling through their News Feed.”
4. Promote your live stream.
Congratulations! You’ve now completed a lot of the major planning and setup for your live stream. Now, how do you get people to watch it?
As we’ve covered, using a landing page is a good way to get enrollment on a platform like Hangouts On Air (or, as of September 12th, YouTube Live). Here’s an example of how we recently used one at HubSpot:
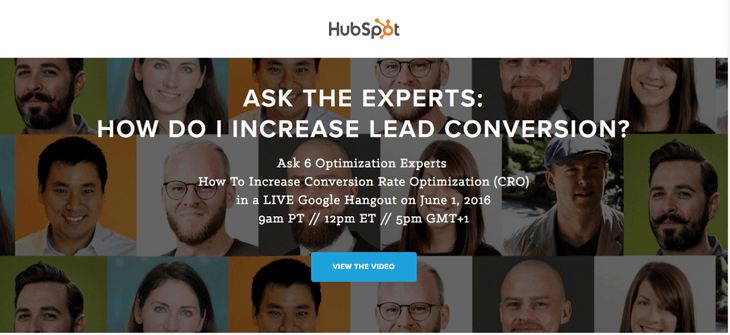
There’s a clear CTA here — “View The Video” — which, when clicked, takes the visitor to a registration form. (And check out this rundown of which channels drive the best conversion rates — it’s got some tips on getting people to your landing page in the first place.)
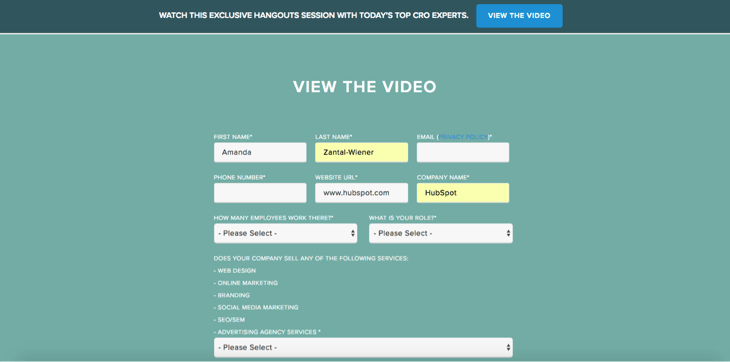
Once someone fills out the form on your landing page, it should lead them to a thank-you page, where you can share some promotional information about the live stream.
HubSpot’s Co-Marketing Demand Generation Manager, Christine White, suggests creating a “Next Steps” section here with actionable items like “add this event to your calendar” and “check back here on [the date of your event]” to remind viewers that’s where they’ll go to view the live stream.
And once you have contact information for your registrants, Conley reminds us, “you can email the people on that list on the day of, and remind them when it’s going to go live.”
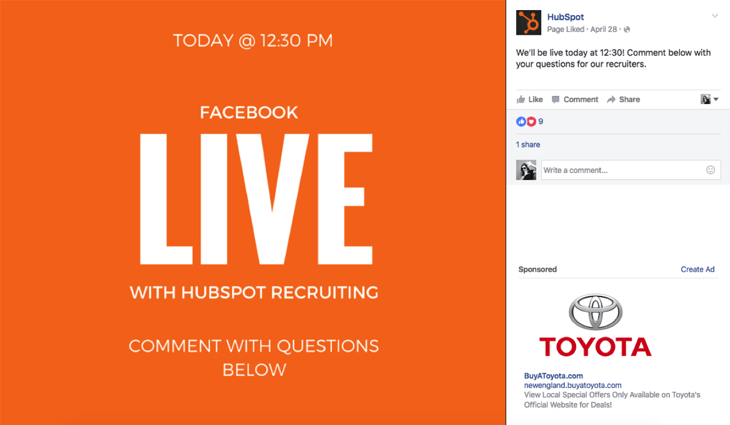
But to promote your Facebook Live stream, says Conley, “It’s really about doing a social image and spreading the word that you are going live at a specific time.”
Don’t rule out using social media to promote live streams on other platforms, too. Some of them, like YouTube, allow you to link your social accounts and push content in multiple places. And if your guests are active on social media, leverage that by including links to their handles in any related content, and ask them to promote the event with their own networks.
5. Do a dry run.
There’s a reason why we do dress rehearsals. When I was in a high school show choir — a humiliating but factual piece of history — it was to make sure I didn’t trip over my dance partner in high-heeled tap shoes.
In the world of live streaming, though, we do dry runs to avoid more technical, but equally embarrassing, missteps. Improv can be hilarious, but not when it means you’re verbally unprepared or your equipment stops working and you don’t have a backup plan.
6. Prep any guest speakers.
Is there anything worse than a moment of awkward, dumbfounded silence?
As part of your dry run, make sure your guests are prepared for any questions they might be asked. Don’t over-rehearse, but do what you can to prevent catching them off-guard.
“It may help to give some questions in advance to a potential guest,” says Hunersen, “but save some follow-up or in-depth questions for on-air, so that you’re able to let them be both prepared and react in the moment.”
7. Test your audio and internet connection.
You might want people to talk about your live stream, but not if all they’re going to say is, “We can’t hear you.” Make sure all of your audio equipment is working both during your dry run and on the day of the stream. Having an extra microphone and batteries on hand probably won’t hurt, either.
Make sure your network can handle a live stream, too. If you’re streaming high quality video, for example, you’ll need both a wire connection and a 3G/4G wireless connection, according to Cleeng.
In other words, make sure your WiFi is working, but also, “grab an ethernet cord,” says Conley. “One thing you can’t help is if your internet connection unexpectedly goes out.”
We know — even the sound of “ethernet” seems terribly old school. But if your WiFi suddenly drops, you’ll be glad you busted that cord out of storage.
8. Set up social media monitoring.
One great thing about live streaming is your audience’s ability to join the conversation and comment in real time.
Juliana Nicholson, Sr. Marketing Manager at HubSpot, advises to “Have a plan for audience engagement. Know when and how you plan to incorporate audience feedback and Q&As and then clearly communicate that information to your attendees.” This will make it so much easier to encourage participation.
But that’s not all you should do with regard to engagement. If you’ve watched any Facebook Live feed, you’ve seen that the comments roll in fast. So while it’s awesome to invite and answer viewer questions, it can be overwhelming, especially if you personalize your responses.
That’s why it’s a great idea to dedicate someone to monitoring social media, comments, and questions during the live feed.
That task can be made a bit easier with something like a branded hashtag created specifically for this live stream. For platforms with built-in comment feeds, for example, you can ask your viewers to preface any questions with it — that can help qualify what needs to be answered.
You could even take that a step further and use the hashtag throughout the planning process, making sure to include it on your landing page, thank-you page, and promotional messages leading up to the event. That helps to create buzz around the live stream. And if you use HubSpot’s Social Inbox, here’s a great place to take advantage of its monitoring feature, which lets you prioritize and reply to social messages based on things like keywords or hashtags.
After Your Live Stream
It’s always nice to follow up with your attendees after your live stream has ended. Thank them for their time, give them a head’s up about your next event, and invite them to download a piece of relevant content. If you’ve followed these steps, you’ve probably done a great job of using your live stream to generate leads, so keep up the momentum and nurture them.
![]()
Read more: blog.hubspot.com